Configure a Mobile Device into Locked Mode
Single App Mode for iOS, or Lock Task Kiosk Mode for Android, allow you to lock an iOS or Android device into a single application. When enabled, the mobile device is restricted to running only one application even if it is rebooted. This mode allows the device to be fully locked from any unauthorized access, and it will remain locked until Single App or Lock Task Mode is explicitly disabled.
You can control how users interact with devices using Single App and Lock Task Modes by enabling or disabling any of the following features:
- Screen auto-lock
- Touch input
- Screen rotation
- Volume control
- Sleep/wake button
- Side switch
Warning: Putting an iOS device in Supervised Mode wipes all the information on the device and resets it. Likewise, when using an Android device, you must return the target device to factory settings which causes all information to be wiped from the device resets it.
Requirements
- For macOS, you’ll need a Macintosh computer running 10.14 Mojave or later.
- For Android, you’ll need 2 Android devices to set up the most secure mode, Lock Task Mode. If you only have a single Android device, then you can only set up the less secure Screen Pinning Mode.
Put an iOS Device into Supervised Mode
While the procedure described here manually puts a mobile device into Supervised Mode, there are other ways to do this via mobile device management (MDM).
To put an iOS device into Single App Mode, the device must first be put into Supervised Mode. To do this, do the following:
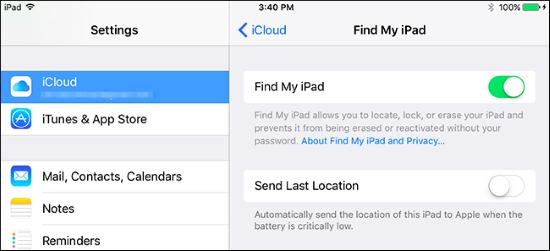
Go to Settings > (User) > iCloud > Find My iPad/iPhone. Disable the Find My iPad/iPhone switch by entering the password.
On your Mac, launch the App Store application and search for Apple Configurator 2. Download and install this application on the computer.
Plug in your iOS device to your Mac.
Launch Apple Configurator 2. You should see something that looks like the image below.
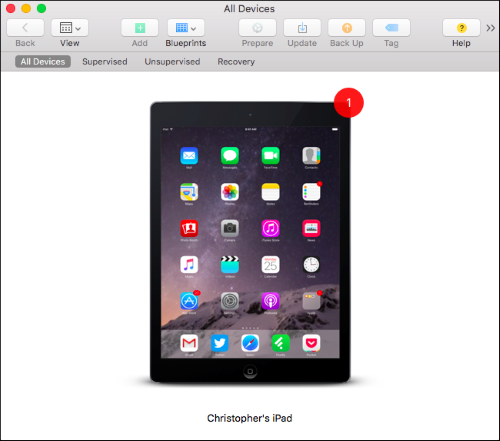
Double-click the device.
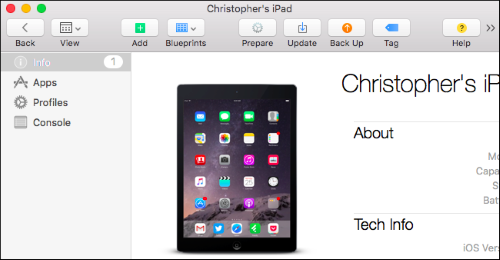
On the Details screen about the device, click the Prepare button.
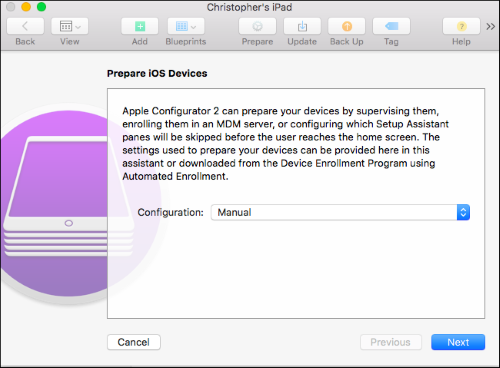
From the Configuration menu, select Manual.
From the Server menu, select Do Not Enroll in MDM unless you have an MDM server you want to use and enroll your device to.
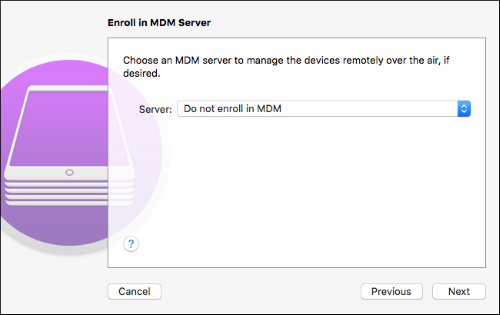
If you selected Do Not Enroll, you must now plug the mobile device into your Mac to configure it.
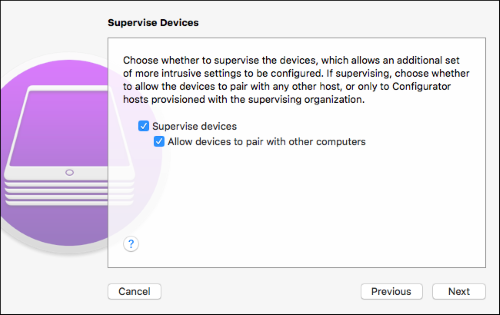
Click the Supervise Devices check box. If you want the device to be configured on multiple computers leave the default Allow Device to Pair with Other Computers selected.
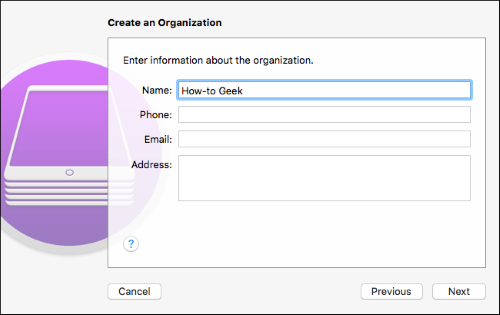
Enter your organization information.
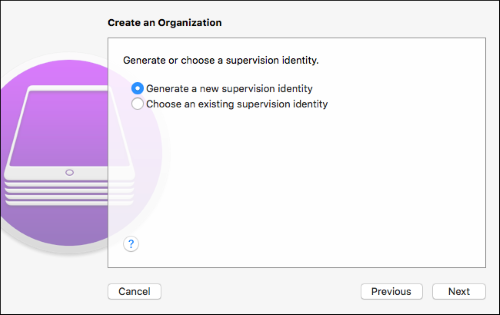
If you’ve previously generated a supervision identity at some point, select Choose an Existing Supervision Identity. Otherwise, you’ll need to generate one by selecting Generate a New Supervision Identity.
Select the options you want the device to run after it is reset. The default options are generally sufficient.
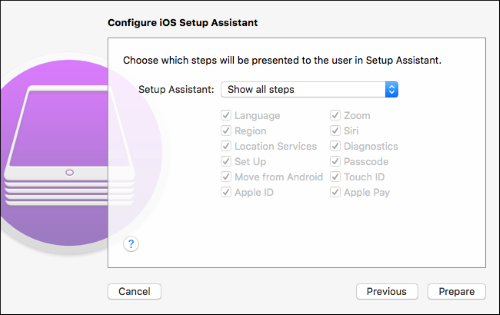
Click Prepare. A status bar will be displayed as ithe iOS device is configured in supervised mode. WARNING: Clicking the Prepare button wipes all information on the device and resets it.
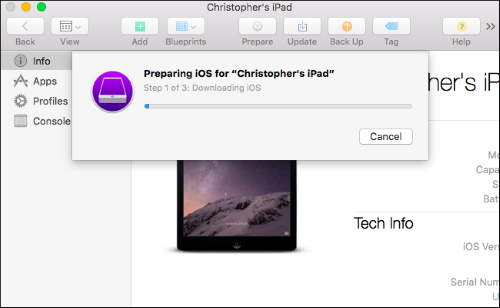
After the device is wiped and rebooted it will be running in supervised mode.
Enable Single App Mode
Note: To continue from this point, the iOS device should be in supervised mode. If the iOS device is not in supervised mode, repeat the instructions from the prior section first to put it in supervised mode.
To enable or disable Single App Mode, do the following:
On your Mac running 10.14 or greater Mojave, launch the App Store application and search for Apple Configurator 2.
Download and install Apple Configurator 2 to your Mac.
Plug in your iOS device to your Mac computer.
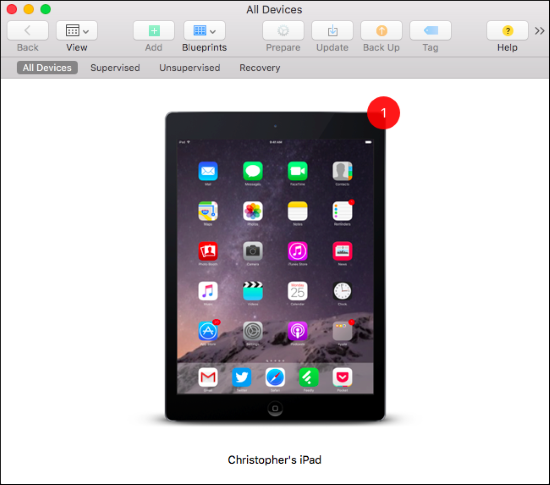
Launch Apple Configurator 2. You should see something that looks like the image below. Double-click the device.
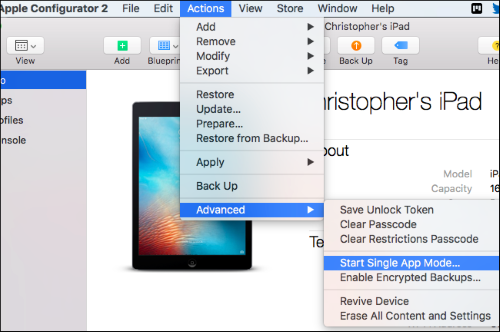
On the Device Details screen, from the Actions menu, click Advanced > Start Single App Mode.
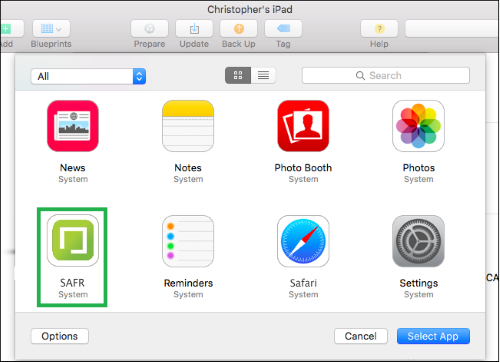
Select SAFR from the list of applications.
Click the Select App button when you’re ready to launch SAFR. The iOS device is now locked in Single App Mode.
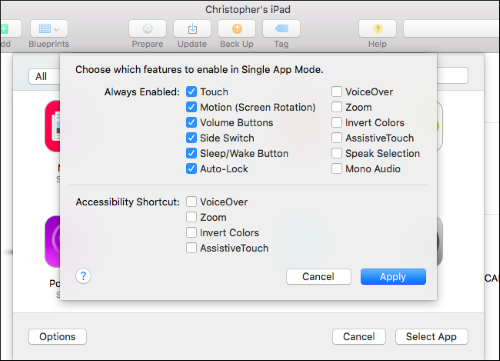
OPTIONAL: If you want to configure advanced options, click Options. From the dialog, select the options you want enabled, and click Apply. However, usually the defaults are sufficient.
When you return to the applications screen, click the SAFR application and click Select App.
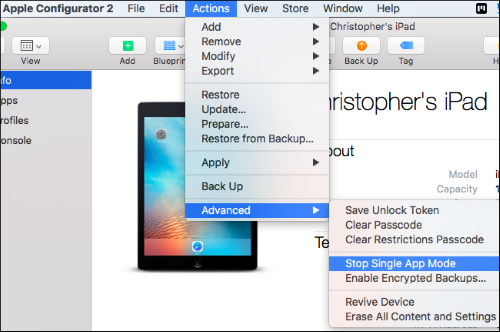
To disable Single App Mode, plug the iOS device into the computer. In the Actions menu, click Advanced > Stop Single App Mode.
Enable Kiosk Mode for Android
There are two kiosk modes available in the Android Mobile client:
- Lock Task mode (LTM): A robust kiosk mode where only administrators are able to alter the configuration or access the data on the device. The device is locked into one application until the mode is explicitly disabled. You must install the Mobile client using SAFR Beam to use this mode.
- Screen Pinning mode (SPM): A less secure kiosk mode without device administrator registration. When using the device you can exit the mode at any time. Available for any Android device with the Mobile client installed.
Note: While this procedure explains how to manually set up a device using SAFR Beam, you can also use the Android Debug Bridge (ADB) command line tool.
To set up and enable Lock Task mode:
- Go to the SAFR download portal and from the menu, select Android.
- Install SAFR Beam on your primary device.
- Set your target device in factory reset prior to use.
- Follow the instructions on the primary device for installing the Mobile client on a target device.
- Once the Mobile client is installed on the target machine, click the lock icon next to the settings gear icon. Follow the instructions for setting the device up for Lock Task mode.
Note: In this mode, the client has full control over the device and only the client can request exiting the mode. - Exiting can be done by tapping the screen three times (3-taps gesture) which displays the system’s security dialog. (assuming that one has been configured) In the dialog, you are prompted to confirm your identity by entering the device’s credentials (PIN, gesture, or fingerprint). If the device does not have security settings in place or your identity is confirmed, the Mobile client restarts in an unlocked state.
Important: You should configure device security either with a PIN, a gesture, or a fingerprint. That way, if a device is turned off while the Mobile client is locked (either by the power button or as the result of drained battery), only a credible user is able to start the device and re-run the Mobile client. When re-run, the Mobile client enters the mode it was in prior to turning off the device.
Note: If you install the Mobile client apart from SAFR Beam, you can still set up security by clicking the lock icon. However, because the Mobile client has not been registered as a device administrator, its security is not as strong as the Lock Task mode.
The following scenarios occur when using the kiosk modes when the Mobile client is or is not registered as a device manager:
| Scenario | Action |
|---|---|
| No device security configured (not registered); you confirm to enter SPM on the security dialog | Exits via 3-taps gesture, or by holding the Recents and Back keys at the same time; the Mobile client is restarted in unlocked state (Screen Pinning mode) |
| No device security configured (not registered); you deny entering SPM on the security dialog | The Mobile client is in locked state but is restarted in unlocked state after approximately ten (10) seconds; a timer is triggered that queries for locked state and corrects it if needed |
| PIN device security configured (registered); you confirm to enter SPM on the security dialog | Exit by 3-taps gesture or by holding the Recents and Back keys at the same time; SAFR prompts you to confirm your identity by entering PIN and if successful, it is restarted in unlocked state |
Note: On some devices, SPM can be explicitly enabled in system’s setting with an option to ask for a PIN upon unlocking/PIN device security configured. If you confirm to enter SPM on the system dialog by exiting by holding the Recents and Back keys at the same time, you are prompted to confirm your identity by entering PIN. If successful, the device home screen is displayed. The next time, SAFR restarts in an unlocked state.